
I’m working on more small textile landscapes at the moment, so here’s a quick look at my process from inspiration through felting and embroidery to finished piece.
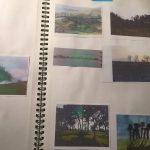
I enjoy taking photographs when I’m outdoors, and have a growing collection of images of bark, flowers, plants, trees, fields, skies and so on. A few years ago I printed out images of trees and stuck them in a sketchbook…and then put the sketchbook to one side! This week I needed some inspiration so I dug out the sketchbook again.
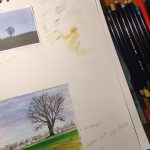
I chose a photo to use as a basis for a sketch to work out composition and colours (with a few notes about changes from the sketch to the final artwork). I used Inktense pencils and water brushes as it’s easier when I’m working on sketches in the house in the evening.
The photograph that I chose was taken in January 2015 in the fields near Wintringham, a village on the edge of the Yorkshire Wolds where I used to live. There were several lovely paths from the village, and it was lovely to do the same walks again and again to see the changes through the seasons.
This week I was able to get out into the studio to start work. The first step is to pick out the colours of wool that I want for felting, with pinks in the sky and the deep red in the field to help to tie the piece together.
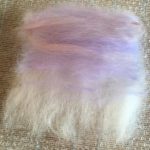
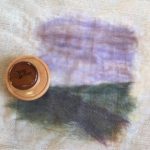

I use merino wool for my base layers, then start laying out a thin ‘wash’ of colour for the sky and field, before adding water and doing a small amount of felting so that the wool starts to hold together.
I add more colours to the field area, paying attention to the direction of the wool to match the furrows of the ploughed field. I usually take lots of photos while I’m working as I find that it helps me to step back and see what needs adjusting. Once I am happy the felt gets ‘fulled’ to hold all the wool together properly.
The next day once the piece is completely dry I needle felt some Black Welsh Mountain wool to create a hedge. I like the texture that I can get from this wool.

I select some threads for embroidering the tree, in this case silk threads – one thick and one thin. I’ve built up quite a collection of embroidery threads over the years and sometimes use cotton, wool, silk or linen threads depending on what effect I am trying to achieve.
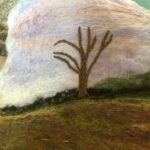
I start off the embroidery with thick threads to build up the general shape of the main branches. I usually use stem stitch for branches. I have used pins to mark out roughly the area that will be visible in the frame (I would use tacking stitches if it was piece that was bigger and needed more embroidery).

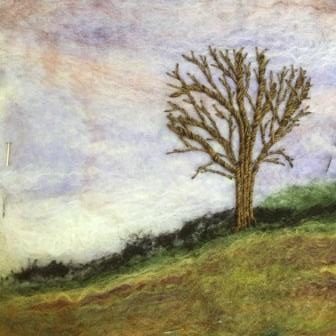
Once the main branches are in place I switch to the thinner thread to add in the smaller branches to fill out the tree. I think the piece is finished, but I will put it to one side for a few days before framing so that I have a chance to see it with fresh eyes.